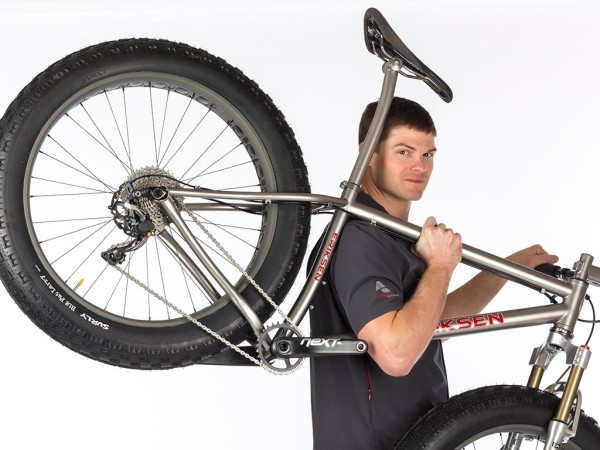
We first saw the Snozocchi on the Kent Eriksen Cycles fatbike and asked designer Brad Bingham of Primary Fabrication Design, who is also employed by Kent Eriksen Cycles as welder/designer/fabricator, for the background and story behind this fat-bike suspension fork. BTW, Brad is a former Moots welder and seriously fast racer! Take it away, Brad…
Concept:
Having ridden many different fat-bikes over the years I’ve experimented with available front suspension options; Marzocchi Shiver SC and Maverik SC32 fit a fairly large tire rim combo without modification. I always enjoyed riding suspension versus rigid fork fat-bikes, but these options were limiting the tire size. In 2008 I started dreaming of modifying an older 30mm Marzocchi Z1 to work with a 135 QR hub. I made good headway on that project and then it sat 95% complete for the past 5 years! Geesh, that’s a long time!! And even more surprising is that in that time no-one has released a fork that I believe is what we’re all looking for in a fat-bike front suspension set-up. I knew I’d be building a fresh fatty with Kent Eriksen this winter and so I decided it was time to truly nail this fork and have something I wanted to ride!
Design:
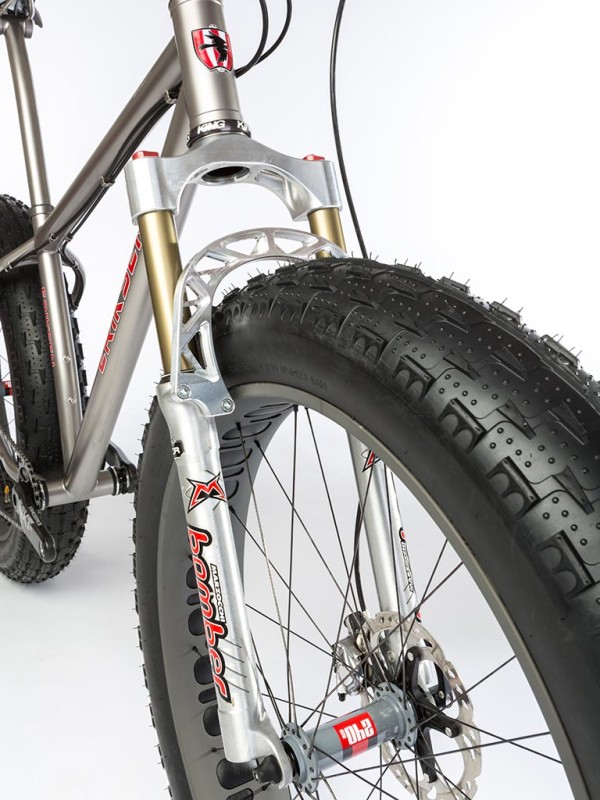
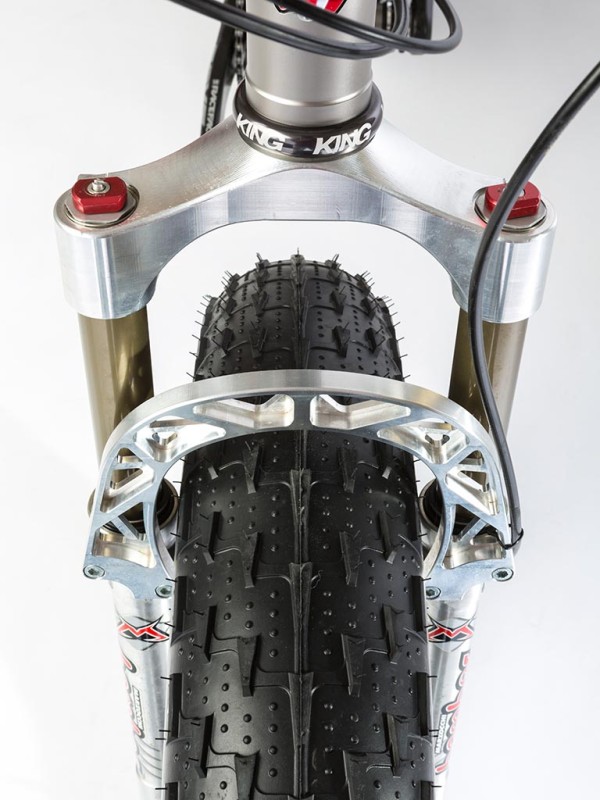
The cool thing about these old ‘Zocchi forks is that they are completely modular, and that when you do the layout for a 135mm front hub they give you all the necessary clearances! I wanted to stiffen up the front end a bit and knew that the accompanying frames would most likely have head tubes that would accept a tapered steerer so I designed the crown for a 1.5”-1-1/8” tapered steerer. The design of the crown is quite elegant with just enough extra material to be on what I consider the “very safe side” of strength as well as stiffness. The “brake arch” as they used to be referred to has been designed to look as much like the original Marzocchi component as possible, I really wanted to pay tribute to these forks that a lot of us have ridden/are riding and love! When designing this fork the Surly Bud 4.8” tire mounted on a 100mm Clown Shoe rim was used as the bench mark of clearance and this set-up will clear that.
Proto/3D printing:
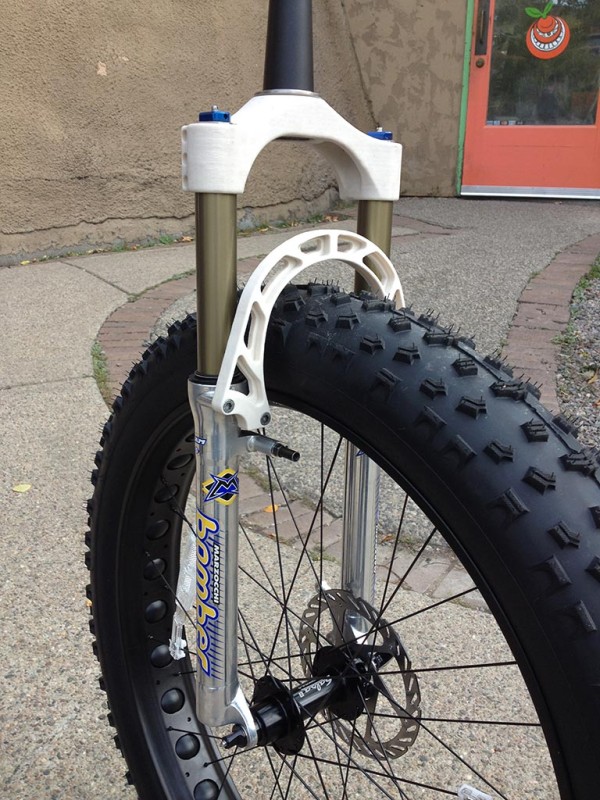
3D printing was used mid-way through the design process. Once I was happy with the direction of the project I had one set of parts made using the 3D process. This allowed me to do a full assembly and verify clearances in the real world.
Manufacturing:
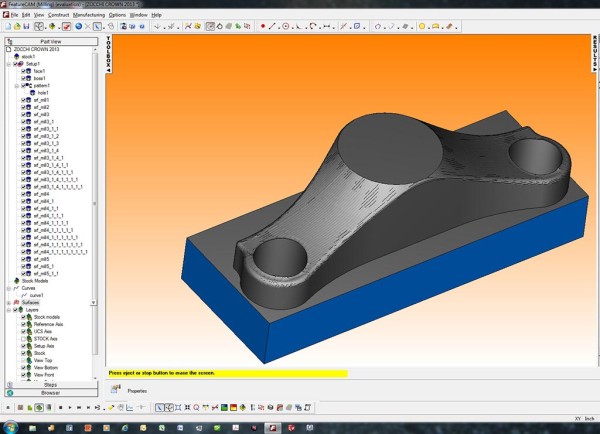
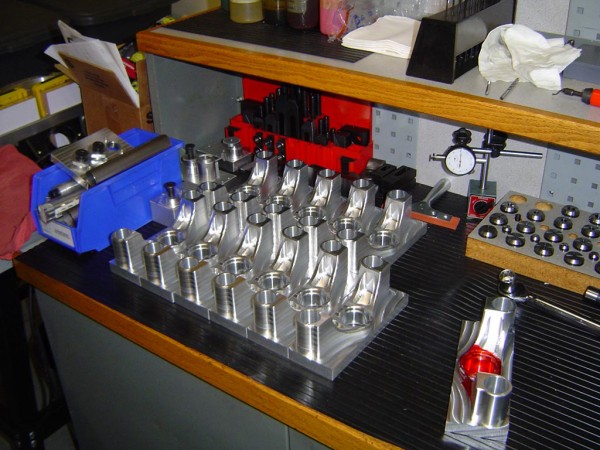
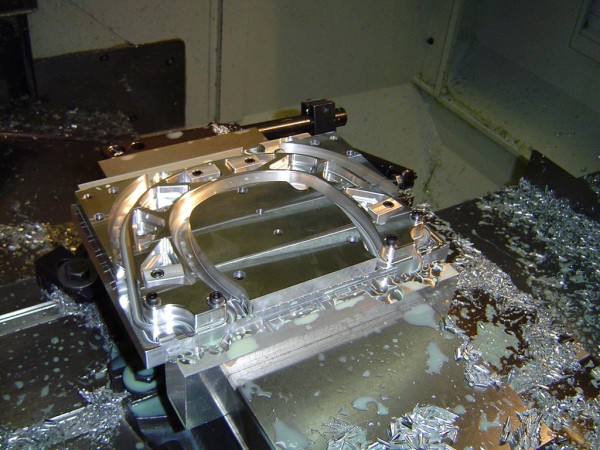
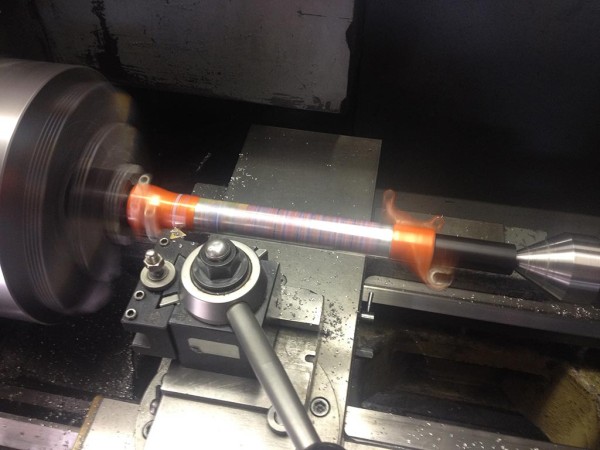
I contracted Fort Collins based Oakes Manufacturing for the CNC work required to make the crown and arches. Oakes Mfg. has an incredibly talented machining staff and it shows all over these two unique parts.
Ride:
This is the fork that all others were compared to back in the day and they still hold their own in small and big hit suppleness. I am able to tweak the suspension travel anywhere from 80mm (even less if you really want it) to 100mm fully extended axle to crown length varies between 490mm-505mm with travel but is not directly proportional due to internal changes to achieve the desired travel.
The ability to maneuver through rough terrain ie: push piles of snow and ruts is greatly improved with the suspension fork. Just like any other mountain bike the inclusion of a suspension fork allows you to ride faster with much improved control.
Sale:
If you’re wondering, “Gee….Are these available? How much for one?”. The answer is: yes, sort of…. These are available in very limited quantity, first come, first served. Cost for a DIY kit which includes the crown with steerer and arch ready to be assembled to your own supplied fork is $750. Cost for a complete and ready to ride fork is $1150. Contact Brad directly at bradti@yahoo.com for orders or contact him through Eriksen Cycles at (970)879-8484.
So…you still looking for more on that Ti Fatbike we teased you with? Just hang on a bit we are on it!!!
What’s the story with what appears to be a DT Swiss 240 hub in 135 in the second picture?
Great looking fork seeing it at the Tennessee pass night jam near leadville!
Amazing work! I’m resurrecting an old 1999 z1 dual right now. Any issues with grinding off the brake bosses? I love the clean look. Cheers!
I did it to mine with a hacksaw and cleaned up with a sanding disc.
http://forums.mtbr.com/fat-bikes/lipstick-pug-949833.html
will this fork fit a small yampa with out hitting frame
Thanks Mike